Pampers and Paklava

  • Home
  • Photography
  • Travel
  • Food
  • Garden
  • Contact

Gluten-free Pizza Recipe – with caramelized onions, pear and herbed goat cheese

June 5, 2013 by Beth Shepherd

Udi's gluten-free pizza Gluten-free pizza with caramelized Walla Walla onions, pear and herbed goat cheese

After our recent trip to Walla Walla, I’ve got onions on my mind. And, in keeping with my gluten-free experimentation phase, I decided to give pizza a whirl. Okay, I didn’t make the crust. Udi’s did. However, the Walla Walla sweet onions and the herbs used in the herbed goat cheese were grown right outside my back door. Now all I need is a goat.

Take the road less traveled,

Beth

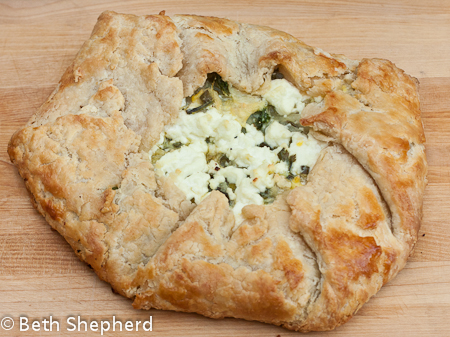
Gluten-free pizza with caramelized Walla Walla Onions, pear and herbed goat cheese recipe

Note: This pizza crust is very thin.

Ingredients:

  • One Udi’s gluten-free pizza crust (they come in a package of two), defrosted
  • 1/2 cup caramelized onions (recipe below)*
  • 1/2 cup herbed goat cheese (recipe below)*
  • 1/2 pear, thinly sliced
  • Olive oil
  • Optional: drizzle of aged Balsamic vinegar
  • Optional: chive blossoms

*Amounts can be varied to suit  your taste

How to construct your pizza:

  1. Preheat oven to 375 (per Udi’s directions).
  2. Line a baking sheet with parchment paper and place the crust on top.
  3. Brush crust with olive oil.
  4. Spoon caramelized onion onto the pizza crust and spread it out evenly.
  5. Place pear slices in a circle on top of the caramelized onions.
  6. Drop small spoonfuls of herbed goat cheese all over the pizza.
  7. Bake for 7-10 minutes until crust is golden.
  8. Before serving, sprinkle a handful of chive blossoms on top.
  9. Slide onto cutting board and slice.

Walla Walla onions and herbed goat cheese

Caramelized Onions* (Note: This recipe makes enough caramelized onions for one small pizza. If you want to make a bigger pizza, or two pizzas, double the recipe)

Ingredients:

  • 1 tablespoon unsalted butter
  • 1 tablespoon vegetable oil* (You can also use 2 T oil and skip the butter)
  • 1/2 pound of Walla Walla or sweet Vidalia onions (roughly 1 medium onion; my garden Walla Wallas were much smaller so I used more)
  • 1 teaspoon brown sugar
  • 1 tablespoon water

How to Caramelize Onions:

  1. Cut the Walla Walla onions into thin slices. I personally like to cut my onions into rings.
  2. Add the butter and oil to a cold non-stick skillet; melt butter over high heat.
  3. Once the butter melts, stir in the onions and brown sugar.
  4. Let the onions cook; stir on occasion until the onion soften down and are slightly wilted. This should take about 5 minutes.
  5. Reduce the heat to medium and cook. Stir often until the onions turn deep brown in color. Depending on the amount of onions you use, it can take up to 50 minutes to cook down and caramelize onions. Patience is a virtue.
  6.  Once the onions are caramelized and you achieve the color you are looking for take it off the heat. I like mine mahogany colored.

Note: Don’t stare at the clock. Instead, pay close attention to the pan. If you want caramelized onions, not burnt onions (which I have made on occasion), stir often and check to make sure the onions are not getting burnt. I can’t stress this enough. Once the onions start to brown, they can burn quickly. You’ve been warned.

Herbed Goat Cheese

Ingredients:

  • Log of goat cheese
  • Olive oil
  • Herbs (assortment that might include any/all of the following: thyme, basil, rosemary, chives, sage, parsley), a few tablespoons chopped.

How to:

  1. Put a log of goat cheese in a bowl; add a healthy drizzle of olive oil and mix in a few tablespoons of minced, fresh herbs.

Want to drool over more deliciousness? Check out Wanderfood Wednesday!

Filed Under: Garden, Recipes Tagged With: chive blossoms, Gluten-free, goat cheese, pears, pizza, Udi's gluten-free pizza, Walla Walla, Walla Walla sweet onions

Go galette: Leek, Walla Walla, goat cheese galette

July 13, 2011 by Beth Shepherd

I love to cook but I am not much of a baker. While I have taken pizza making classes and bread making classes, I don’t think I’ve ever made either. And though I love pies (which would pair nicely with ice cream I frequently make), I can count on one hand the number of pies I’ve made. Why? I have dough-phobia.

Leek and goat cheese galette in the makingThat’s right. Fear of dough, or at least of making it. I worry my end-product will be inedible: crusts too dry, loaves too dense, pizza dough too mushy. Too brown? Not brown enough. On top of this, the perfection aspect of crusts, in particular, makes my hands tremble. Cute little lattices or scallop-edged crusts seem so fussy.

So that’s why the idea of making galettes has appealed to me for quite some time. Rustic, free-form and imperfect: now there’s dough I could learn to love. I finally decided to give galettes a go.

Galette before bakingA few leeks in the garden were ready for picking and my Walla Walla sweet onions were also coming in nicely. I remembered a recipe from my old Deborah Madison cookbook that would handily transfer my garden alliums into galette gastronomy.

Poor Big Papa. I sweated and fretted as I went about making the dough, rolling it out and filling it with my precious garden cargo. Should I have a back-up plan for dinner? Was my galette going to get the green light?

The answer: YES! My, oh, my. The dough was crispy where it should be crispy, chewy where it should be chewy, and the perfect foil for the creamy goat cheese and savory leek-onion filling nestled inside. Galettes are definitely a go from now on.

Leek and goat cheese galette

Leek, Walla Walla Onion and Goat Cheese Galette


Galette Dough
2 cups all purpose flour or whole wheat pastry flour
½ teaspoon salt
1 tablespoon sugar
12 tablespoons (3/4 cup) cold, unsalted butter, cut into small pieces
1/3 to ½ cup ice water, as needed

Mix the flour, salt, and sugar together in a bowl. Cut in the butter by hand or using a mixer with a paddle attachment, leaving some pea-sized chunks. Sprinkle the ice water over the top by the tablespoon and toss with the flour mixture until you can bring the dough together into a ball. Press into a disk and refrigerate for fifteen minutes if the butter feels soft.

Filling Ingredients

6 large leeks, including an inch of the green (*I combined a few leeks with a few Walla Walla sweet onions)
3 tablespoons of butter
1 teaspoon chopped thyme
1/2 cup dry white wine
1/2 cup cream
Salt and pepper
1 egg beaten
3 tablespoons chopped parsley or chopped tarragon
Galette Dough
1/2 cup soft goat cheese (you could also use Ricotta Salata or feta, though I prefer the creamy texture of the goat cheese)

Directions

Slice leeks/Walla Walla onions in circles about an inch thick.  You should end up with about six cups.

Melt the butter in a medium skillet.  Add the leeks/onions, thyme, and 1/2 cup water.  Stew over medium heat, stirring frequently, until the leeks are tender, about twelve minutes.  Add the wine and continue cooking until it’s reduced, then add the cream and cook until it just coast the leeks and little liquid remains.  Season with salt and pepper, and let it cook for 10 minutes. Then stir in all but 1 tablespoon of the beaten egg and 2 tablespoons of the tarragon or parsley.

Preheat the oven to 400 degrees.  Roll out dough for one large galette.  Place unbleached parchment paper on a baking sheet. Put the rolled out dough on top of the parchment paper and spread the leek-onion mixture on top, leaving a 2-inch border around the edge.  Crumble the cheese on the top and then fold the dough over the filling.  Brush with the reserved egg and bake until the crust is browned, 25 to 30 minutes.  Remove, scatter remaining parsley over the top, and serve.

Recipe adapted from Vegetarian for Everyone by Deborah Madison

Want to chew on more deliciousness? Check out Wanderfood Wednesday!

Filed Under: Garden, Recipes Tagged With: Deborah Madison, Galette, goat cheese, leeks, Vegetarian for Everyone, Walla Walla sweet onions

Fava beans and a nice Chianti

July 21, 2010 by Beth Shepherd

Fava beans green as fresh spring grass (yes, even though we’re well into summer) graced our table this past weekend. I plucked our entire homegrown crop so that we could make a meal of them because, as I’ll soon explain, it takes a lot of fava beans and a lot of elbow grease to get a bowl of favas for dinner.

fava plantsVicia Faba, the Fava bean, is a “broad bean” also known as Windsor bean, English bean, horse bean and pigeon bean. The fava is among the most ancient plants in cultivation, and has long been a diet staple in Asia, the Middle East, South America, North Africa and Europe. In fact, they are the only beans Europeans ate before they discovered America and all its legumes. They took our beans home and left us the fava, which never really caught on (until recently).

Flowering favasYou figure out why as soon as you begin to prep your favas for feasting. First, you string and shuck the beans (ok, in my case, first you grow the beans!), then parboil them before removing the exterior waxy “shell” and popping out the bright shiny bean inside. It is something to do on a lazy sunny afternoon (now that we have them) on your back porch or around the kitchen table with a couple friends and a bottle of wine. It’s a lot of time to spend on a bean. But it is oh-so-worth-it!

fava beansFor me shelling the beans is almost meditative which is how I feel about gardening in general. Focus, focus, focus but without much actual thought and pretty soon you look around and see how much you’ve actually accomplished. Inner peace and dinner all at once.

Unshelled, fresh favas look like giant, bumpy string beans. They are 5 to 7 inches long and lined with padding that looks like cotton batting. They grew happily and easily in my garden with lovely purple and white flowers late spring before the beans grew. My only gardening regret was that I didn’t plant more of them.

favas in their soft pod nestAside from the fava’s dubious distinction in ‘Silence of the Lambs,’ they are truly a bean to take note of.  Nutritional powerhouses that are high in fiber and iron, and low in sodium and fat, they have no cholesterol but so much protein they are called the “meat of the poor.”

shelling favasItalians even credit the fava bean as a factor in saving Sicilians from starvation during a time of famine. Since then, the fava has been considered good luck and is plays a key role on St. Joseph’s Day. Some people believe that if you keep one in the pantry, there will always be food in the kitchen.

The only drawback that I can see to favas, besides the amount of labor you’ll exert to get them to your table, is that a small minority of people are affected by an enzyme deficiency called Favism. People who have this deficiency can experience severe effects after eating broad beans like fava.

Recipes for dining on favas are plentiful. I’ve had them mashed into a pate, mixed in a salad or served simply with olive oil, a squeeze of lemon and shavings of parmesan cheese. Big Papa and I enjoyed ours tucked into a divine risotto with asparagus (still a bit of local stalks left) and saffron.  Our bowl of risotto paired wonderfully with grilled salmon…and a “nice Chardonnay” (thank you Anderson Family Vineyard).

No disrespect to Hannibal Lecter intended, but to my mind Chianti felt overpowering when I considered the nutty delicateness of fava beans. Granted Dr. Lecter savored his favas with a censor taker’s liver (and such a pairing trifecta it was as only a psychiatrist would know since favas, wine and liver are three no-no’s if one is taking MAO inhibitors used to treat depression).

So try your luck with the lucky bean. Put a dried fava in your pocket  to ward off the effects of our sagging economy. Legend has it that you will never be broke as long as you carry one.

Risotto with fava beansRecipe credit goes to Martha Rose Shulman and the New York Times. And, while I cannot claim to grow saffron-producing crocuses, I did substitute Walla Walla sweet onions from our garden in place of the spring onion. Chives were picked right outside the back door of the Urban Cabin.

Risotto with asparagus, fava beans and saffron

  • 2 pounds fava beans
  • About 7 cups chicken or vegetable stock, as needed
  • 2 tablespoons extra virgin olive oil
  • 1/2 cup minced onion or spring onion* (*I substituted garden-fresh Walla Walla onions)
  • Salt, preferably kosher salt, to taste
  • 2 garlic cloves, minced
  • 1 1/2 cups Italian arborio rice
  • 1 pinch of saffron threads
  • 1/2 cup dry white wine, such as pinot grigio or sauvignon blanc
  • 1 pound asparagus, trimmed and cut into 1-inch pieces
  • 1/2 cup freshly grated Parmesan cheese
  • Freshly ground pepper to taste
  • 2 tablespoons chopped chives (optional)
  1. Prepare the fava beans. Shell them while you bring a medium pot of water to a boil. Drop the beans into the water, and boil small favas for one minute, large favas for two minutes. Transfer at once to a bowl of ice-cold water. Drain. Remove the skins, using your thumbnail to open up the skin at the spot where the bean attached to the pod, then gently squeezing out the bean.
  2. Pour the stock or broth into a saucepan, and bring it to a boil. Add the asparagus, and blanch for three minutes. Remove the asparagus with a slotted spoon or skimmer, refresh in a bowl of cold water, drain and set aside. Turn down the heat under the stock, and keep at a simmer with a ladle nearby or in the pot. Make sure that it is well seasoned.
  3. Heat the oil over medium heat in a wide, heavy skillet or saucepan, and add the onion and 1/2 teaspoon salt. Cook, stirring, until tender, about three minutes. Add the garlic and the rice. Cook, stirring, until the grains of rice are separate and beginning to crackle, about one to two minutes. Rub the saffron between your thumb and fingers, and stir into the rice.
  4. Add the wine, and stir over medium heat until it has been absorbed by the rice. Begin adding the simmering stock, two ladlefuls (about 1/2 cup) at a time. The stock should just cover the rice and should be bubbling, not too slowly nor too quickly. Cook, stirring often, until the liquid is almost absorbed. Add another ladleful or two of the stock, and continue to cook in this fashion — adding more stock when the rice is almost dry, then stirring — for 15 minutes. Then stir in the asparagus and the fava beans and another ladleful or two of stock. Continue adding stock and stirring the rice for another 10 to 15 minutes, until the rice is cooked al dente and the vegetables are tender. Add more stock to the rice, and stir in the Parmesan, pepper and chives. Remove from the heat. Taste and adjust salt. The rice should be creamy. Stir once and serve right away in wide soup bowls or on plates.

Yield: Serves four to six

Advance preparation: You can begin this recipe several hours ahead and finish it just before serving. Cook halfway through step 4 — that is, for about 15 minutes. The rice should still be hard when you remove it from the heat. Spread in an even layer in the pan, and arrange the asparagus and favas over the top. Fifteen to 20 minutes before serving, bring the remaining stock back to a simmer and reheat the rice. Resume cooking as instructed. The favas can be blanched and shelled a day or two ahead and refrigerated.

Bonkers for beans and more? Check out Wanderfood Wednesday!

Filed Under: Food, Garden Tagged With: Anderson Family Vineyard, Chianti, Dr. Lecter, English beans, fava beans, Favism, Hannibal Lectur, horse beans, Martha Rose Shulman, New York Times, pigeon beans, Silence of the Lambs, Walla Walla sweet onions, Windsor beans

Some might fend off a mid-life crisis by leaving the comforts of their corporate salary to jet off to a deserted island. Others might buy a Jaguar. I’ve chosen to dive head-long into my 50s and beyond by becoming a first-time parent. At any given moment you might find me holding a camera, a spade, a spatula or a suitcase. Or my little girl's hand. Adopted from Armenia, she puts the Pampers and Paklava into my life.

Subscribe to Blog via Email

Enter your email address to subscribe to this blog and receive notifications of new posts by email.

Recent Posts

  • Ghosts and goblins of Halloweens past
  • Raise a glass—or ten
  • No me without her: A life before motherhood
  • Leaving the orphanage with a priceless pair of tights
  • Rock of ages: Celebrating five years together as a family

Tags

366 Project Adoption anniversary Armenia autumn Bainbridge Island Baja Birds birthday blog cat cats chickadee China Christmas fall ferry flowers France Garden Gyumri Halloween Hawaii Holiday ice cream Kauai leaves London Mamas with Cameras Mexico Mother's Day Mt. Rainier New York orphanage Paris Puget Sound robin Seattle taxi Thanksgiving Tibet USCIS Valentine's Day wedding Yerevan

Categories

  • Adoption
  • Armenia
  • Family
  • Food
  • Friendship
  • Garden
  • Holiday
  • Miscellaneous
  • Paris
  • Photography
  • Recipes
  • Review
  • Seattle
  • Things to do with kids
  • Travel

Sites I like

  • The Wayfaring Voyager
  • Wanderlit
  • Wanderlust and Lipstick
follow us in feedly

Image Copyright

Unless specifically mentioned, all images on my blog are my own original photographs and, therefore, copyright protected (©Beth Shepherd). Feel free to use my images for non-commercial use so long as you provide me with the image credit. Likewise, if you pin my images to Pinterest, please mention me by name.

Copyright © 2026 · Pamperspaklava · WordPress Barista