Pampers and Paklava

  • Home
  • Photography
  • Travel
  • Food
  • Garden
  • Contact

Gluten Free Apple Pie Recipe

October 29, 2014 by Beth Shepherd

Gluten free apple pie

Our first Family Pie Day was a huge success. Big Papa, Little Bird and I got busy in the kitchen with our local cousins, and made Gluten free Apple Pie, from scratch, with apples from our trees!

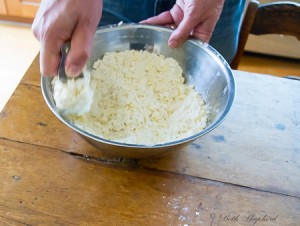
Big Papa and I had already prepared the gluten-free dough that we would use to make two 9″ crusts. Remember this dimension. It will become important later. We used Bob’s Red Mill ‘Gluten Free Pie Crust (Thanks, Bob!) and the real deal when it came to solid fats (I’m talking to you, butter, and you shortening). You can find the recipe we followed, right on the package of the pie crust mix, here.

Apple pie cutting in butter

Apple pie making dough

Apple pie dough ready to chill

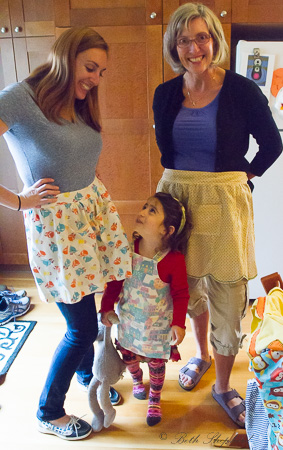
Now back to Family Pie Day. First came the donning of the aprons. Here are the girls! Little Bird’s apron was once her cousin’s.

The girls and their aprons

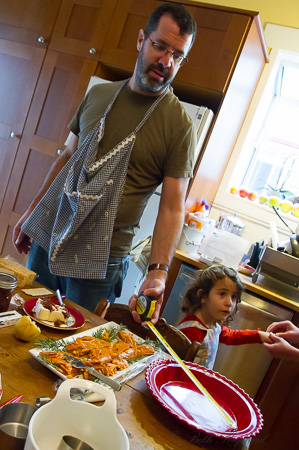
And the boys. With their aprons, and…

The boys and their aprons

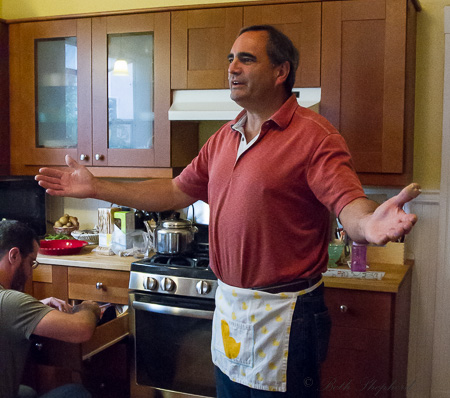
…their tape measure. More on this shortly.

The boys and their aprons and tape measure

First we cut our apples, emphasis on ours. If you want to read more about growing espalier apples, check out my post, here. I couldn’t be prouder of our first big apple crop. We used a variety of less-than-beauty-pageant-ready apples: some tart, others sweet; some crisp, others tender. Peeled, cored and blemishes removed, they looked mighty fine for pie-making!

Apples!

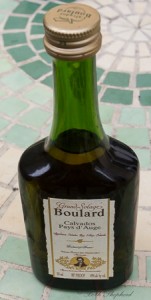
The recipe we chose called for an optional tablespoon of brandy, and Calvados (apple brandy from the French region of Lower Normandy), was recommended…if you have it. Which, in fact, we did. I’ve been waiting for the perfect moment to use the little bottle we got on one of our flights to France. Oh how we love you, Air France with your delicious airplane food (as airplane food goes), free champagne and brandy. We added a tablespoon (okay, maybe two) to our pie filling. I taste-tested the Calvados first to make sure our brandy was still “good.” It was very good.

Calvados

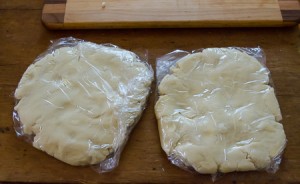
Next we needed to roll out the dough. This is the place in the apple pie making process where–depending on your point of view–having two engineers in the kitchen is either a blessing or a curse.

We rolled.

Rolling out the crust

We measured.

Measuring the crust

We rolled some more.

Our little roller

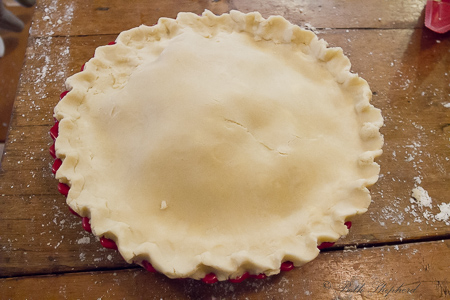
And we measured. Both engineers were at the ready to measure, and remeasure, until we were sure–very sure–that our crust would meet the 12-inch recommended size, in order to fit into the 9-inch pie pan. I imagine the boys probably left some margin for error, and I’m also certain the margin was very small. Finally it was time to pour our pie filling into the crust, and top the pie off with the second crust. After brushing the crust with an egg wash and cutting a few slits in the top, our Family Pie was ready for baking in our (new!) oven.

Apple pie coming together

Pie gets a top crust

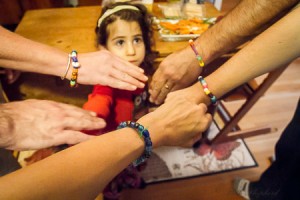
Then we retired to the living room to wait while the magic of pie baking transpired. Let the bead making commence.

Beading bracelets

Beaded bracelets

And the dancing.

Dancing 3

Dancing

Dancing 2

This is what everyone does while waiting for pie to bake, right? At last, the buzzer let us know our Family Pie was ready to eat. The pie came out of the oven and what a lovely pie it was.

Homemade apple pie

So we all retired to the dining room, took a seat, a slice of pie, a scoop of ice cream and a glass of wine.

“Dada, can I have some wine?” “No, sweetie.”

This pie, our pie, was THE BEST PIE I’ve ever tasted. Maybe it was the homegrown apples? Or the made from scratch gluten free crust? Or the Calvados, all the way from France? Or maybe it was simply because we all lent a hand–literally–to create our Family Pie.

Gluten-free apple pie

To family and to pie!

Take the road less traveled, Beth

Filed Under: Recipes Tagged With: recipe

Armenian feast in Amish country?

August 20, 2013 by Beth Shepherd

Armenian kebab

We recently spent a weekend in lovely Lancaster, Pennsylvania, attending a reunion for families with children adopted from Armenia. Who would think we would find an Armenia feast in the middle of the Amish countryside? But find a feast we did!

Armenian dolma

Armenian Delight from Broomall, Pennsylvania cooked up delicious dolma, kebab, tabouli, kufta and, of course, pakhlava. I ate every bite off my plate, got seconds, and reminisced about all the amazing food we enjoyed in Armenia.

Armenian tabouli

Pakhlava

I’ve cooked a number of Armenian dishes, but have yet to try making kufteh at home. Not for long! Here’s a recipe for Vospov (Merjimek) Kufteh with thanks to Bev, Aunt Rose and the Armenian Memorial Church in Watertown, Massachusetts.

Armenian kufteh

Vospov (Merjimek) Kufteh

Ingredients

  • 1 cup split red lentils
  • 3 cups water
  • 1 tsp salt
  • 1tsp red pepper
  • 1 cup medium bulgur
  • 1/2 cup butter or margarine, melted
  • 1 medium onion chopped
  • 2 scallions, chopped
  • 1/2 sweet green pepper, chopped
  • 2 cups parsley, chopped
How to:
  1. Boil lentils 30 minutes in the water (will look pasty).
  2. Add salt ad red pepper and additional water, if needed and boil 2 minutes longer.
  3. Put bulgur in a large basin and pour lentils over it.  Mix, cover, and let cool one hour.
  4. Brown the onion in the melted butter or margarine add add to the bulgur/lentil mixture.
  5. When cool enough to handle, knead 5 minutes until well-blended.
  6. Mix in the chopped vegetables and add more salt and red pepper to taste.
  7. Shape into individual servings by squeezing a portion against the palm of your hand gently with your fingers.
  8. Serve while still warm.
Want more mouth-watering ideas? Check out Wanderfood Wednesday!

Filed Under: Food, Friendship Tagged With: Amish, Armenian, Armenian Delight, Bakhlava, Broomall, Dolma, kabab, kufteh, Lancaster, Pakhlava, recipe, reunion, tabouli

Pakhlava Recipe

July 22, 2009 by Beth Shepherd

Three cups of nuts, a cup and a half of butter, layers of flakey pastry, and enough sugar for an entire village, that’s Pakhlava. This weekend, Big Papa and I went to a shindig at “the other Beth’s,” aka Beth Whitman, the Wanderlust and Lipstick travel Diva! I thought it fitting to bring along some homemade Pakhlava. Plus, if I’m going to become a Mama to an Armenian child, I need to practice my Pakhlava technique.

Plate of PakhlavaIn a previous post (You say Baklava and I say Pakhlava), I wrote a bit about the history of Baklava (the dessert and my own experience with it). I also touched on approach various countries take when baking this delectable pastry. Walnuts, pistachios, or almonds? Honey and sugar, or just sugar? Cinnamon or Cardamom?

Over the years, I’ve made a few variations on the them, but in this period of my life there’s no question. It’s Armenian Pakhlava all the way.

Pakhlava

Ingredients
1 pound (25) prepared Filo or Phyllo* dough sheets (approx. 13″ x 17″)
3 cups chopped walnuts
1 cup finely chopped almonds 1/2 cup sugar
1 Tablespoon cinnamon
1 orange peel, grated
1-1/2 cup clarified butter**

Syrup
2 cups sugar
1-1/2 cups water
4 oz. honey***
1-1/2 Tablespoon lemon juice

Preparation
1. Mix nuts, sugar, cinnamon, orange peel for filling.
2. Butter bottom and sides of a 13″ x 9″ x 2″ baking pan.
3. Cut sheets of Filo in half to fit the pan.
4. Place 10 cut sheets of Filo in the bottom of the pan, lightly brushing each layer with melted butter.
5. Sprinkle 1/3 of nut mixture on top of sheets.
6. Repeat with next 10 sheets and nuts until you have 30 layers of Filo and three of nuts
7. Place about 20 layers of Filo on top, lightly buttering each.
8. Using a sharp knife, cut through dough lengthwise and then diagonally about 1 1/2 to 2″ apart to make diamond shapes and pour a little melted butter on each diamond. Sprinkle lightly with water to prevent curling of top layers.
9. Bake for 15 minutes at 350° F.
10. Pour any remaining butter over dough and continue baking 25-30 minutes until it is golden brown in color. It is very important not to undercook the pastry.
11. While Pakhlava is baking, prepare syrup.
12. Place sugar, water and honey in a large pot and stir over medium heat until sugar has dissolved. Add lemon juice. Bring to a boil and continue to boil for 15 minutes.
13. Cool to lukewarm.
14. When dough is finished baking, spoon syrup evenly over Pakhlava. Let Pakhlava set for several hours. Cut into serving portions.

Notes
* Filo/Phyllo Dough: Paper thin prepared strudel-like dough used for flaky pastries such like Pakhlava. Filo is sold fresh or frozen, approximately 22 – 35 sheets to the pound box, depending on size and thickness.25 sheets are needed for this recipe. Frozen Filo dough is available in 1 lb boxes at most supermarkets in the freezer section. When using frozen Filo, it is important to slowly thaw the dough overnight in the refrigerator and then let it come to room temperature (unopened) for two hours before using. Filo dough dries quickly in the heat of the kitchen. Work with one sheet at a time, keeping the rest covered with a lightly dampened cloth.

**Clarified butter is used frying and making pastries. It is better than ordinary butter because it does not burn as easily. Pastries made with clarified butter will retain their freshness longer.

***The Greeks use honey in their syrup Armenian do not. Instead increase sugar to 2-1/4 cups.Homemade Pakhlava

Clarified Butter

You can also find clarified butter or Ghee, pre-made, in specialty grocery stores
Yield: 3 cups

Ingredients
2 lbs. unsalted butter

Preparation
1. Place 2 lbs. butter in a heavy saucepan. Melt over low heat.
2. Skim off foam with a spoon as it rises.
3. Simmer until the milky residue in the bottom of the pan begins to lightly brown (do not burn!)
4. Carefully pour off the clear butter into a container, leaving the residue at the bottom.
5. Cover and refrigerate.

Note
You can make this ahead and have it on hand. It will keep well for weeks in the refrigerator.

Filed Under: Food Tagged With: Baklava, Beth Whitman, clarified butter, cooking, Filo, Ghee, Pakhlava, pastry, Phyllo, recipe, Wanderlust and Lipstick

Some might fend off a mid-life crisis by leaving the comforts of their corporate salary to jet off to a deserted island. Others might buy a Jaguar. I’ve chosen to dive head-long into my 50s and beyond by becoming a first-time parent. At any given moment you might find me holding a camera, a spade, a spatula or a suitcase. Or my little girl's hand. Adopted from Armenia, she puts the Pampers and Paklava into my life.

Subscribe to Blog via Email

Enter your email address to subscribe to this blog and receive notifications of new posts by email.

Recent Posts

  • Ghosts and goblins of Halloweens past
  • Raise a glass—or ten
  • No me without her: A life before motherhood
  • Leaving the orphanage with a priceless pair of tights
  • Rock of ages: Celebrating five years together as a family

Tags

366 Project Adoption anniversary Armenia autumn Bainbridge Island Baja Birds birthday blog cat cats chickadee China Christmas fall ferry flowers France Garden Gyumri Halloween Hawaii Holiday ice cream Kauai leaves London Mamas with Cameras Mexico Mother's Day Mt. Rainier New York orphanage Paris Puget Sound robin Seattle taxi Thanksgiving Tibet USCIS Valentine's Day wedding Yerevan

Categories

  • Adoption
  • Armenia
  • Family
  • Food
  • Friendship
  • Garden
  • Holiday
  • Miscellaneous
  • Paris
  • Photography
  • Recipes
  • Review
  • Seattle
  • Things to do with kids
  • Travel

Sites I like

  • The Wayfaring Voyager
  • Wanderlit
  • Wanderlust and Lipstick
follow us in feedly

Image Copyright

Unless specifically mentioned, all images on my blog are my own original photographs and, therefore, copyright protected (©Beth Shepherd). Feel free to use my images for non-commercial use so long as you provide me with the image credit. Likewise, if you pin my images to Pinterest, please mention me by name.

Copyright © 2026 · Pamperspaklava · WordPress Barista